DIY Ice Pop Ornaments
Posted 12/08/17
Created by Jasmin Fine
 I love snacking on Budget Saver Ice Pops because they taste great and don't cost a lot. Plus, I can find them in almost any grocery store in my area. I have been saving the leftover sticks, hoping for a reason to use them eventually.
With the holiday season here, I realized I can use them to make ornaments! This is a wonderful repurposing DIY that prevents waste, and is fun for kids.
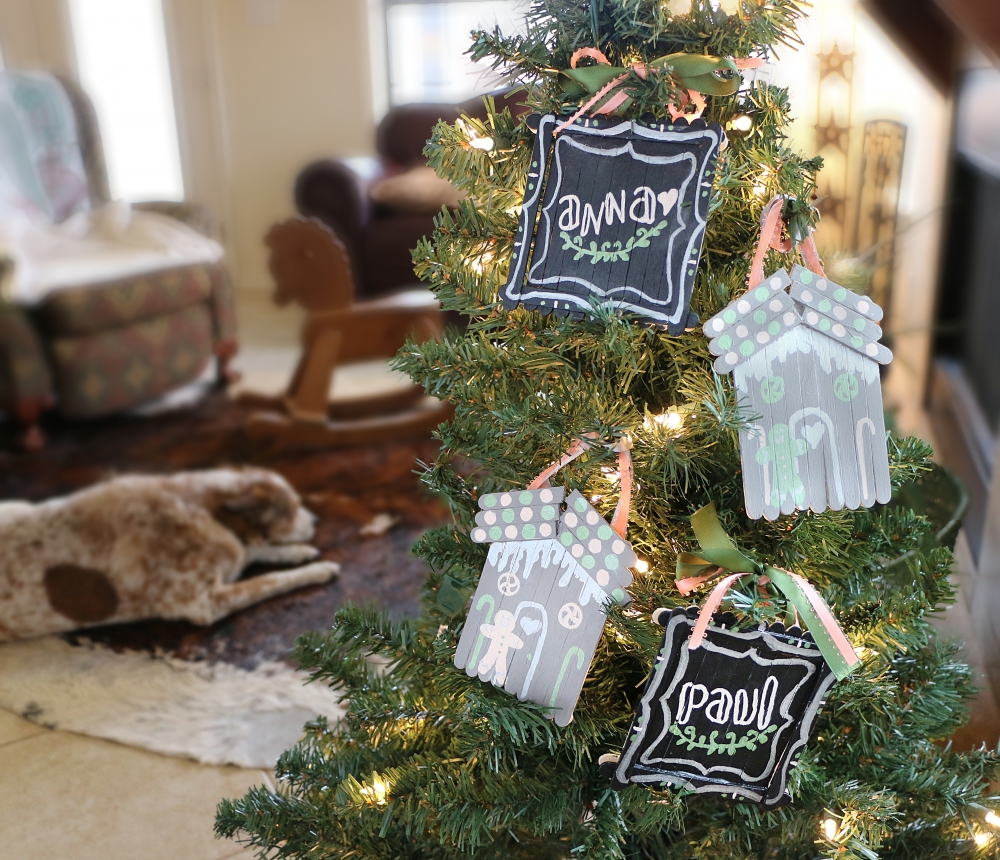
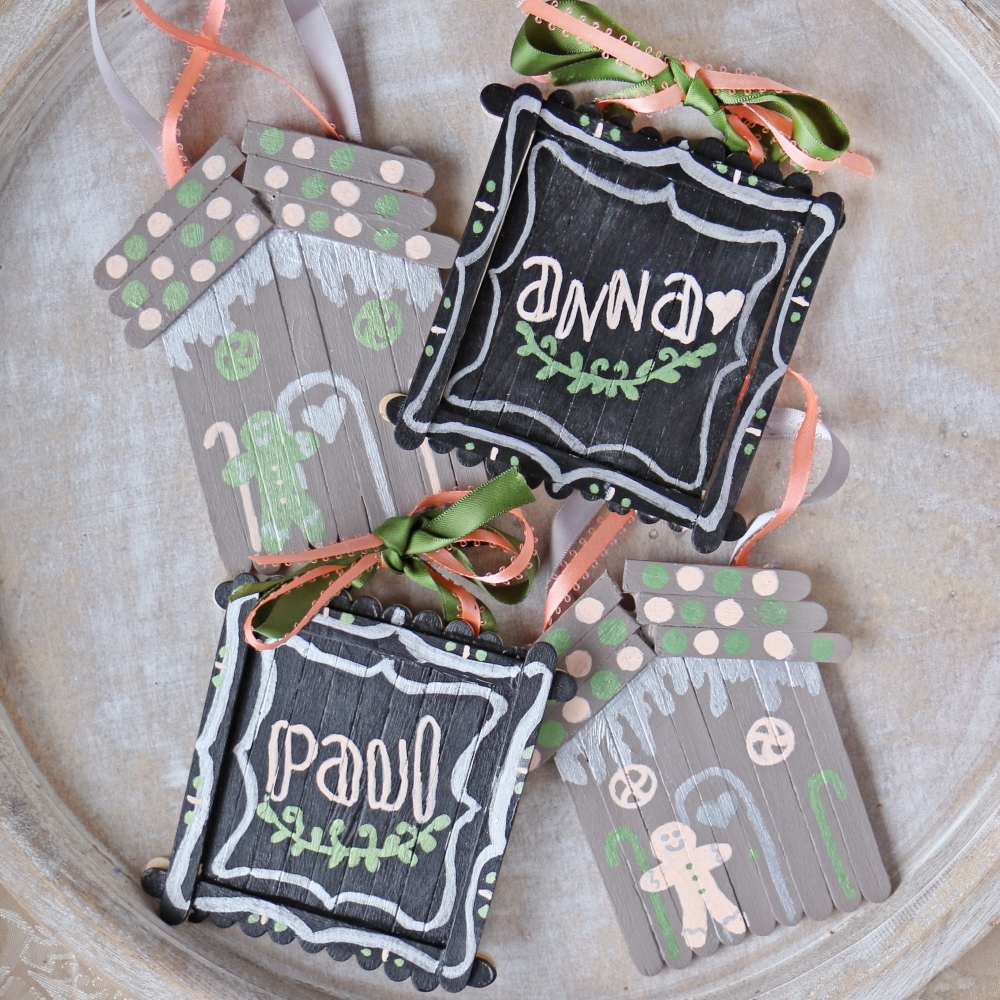
These stick ornaments are chalkboard ornaments. So once they are painted, hand them out at holiday parties or family get togethers for adults and children to draw on with colorful chalkboard pens.
Erase the chalk. Then save them for next year. One ornament is a gingerbread house, the other is a frame to write names or draw family members.
Find your Buget Saver Ice Pops through the store locator under the "Find Favorites" tab. And don’t forget to save the sticks!
Tools:
- Budget Saver popsicle sticks
- Modge Podge
- Sponge paintbrush
- Chalkboard paint
- Ribbon
- Glue gun with glue sticks
- Chalkboard pens
 Frame Instructions:
- Create a square with popsicle sticks.
- Coat one side of another popsicle stick with Modge Podge or glue and lay across square.
- Lay across the edge of square.
- Once dry, flip over.
- Lay four sticks around the sides to create a border.
- Allow to dry.
- Coat front of ornaments in colorful or black chalkboard paint.
- Allow to dry and paint a second layer, or follow paint brand instructions.
- Use a glue gun to stick ribbons to the back of the ornaments.
- Draw on ornaments with chalkboard paint pens. Erase and redraw as you please.
- Hang on a tree, doorknob, door, or wall.
House Instructions:
- Create a square with popsicle sticks.
- Coat one side of another popsicle stick with Modge Podge or glue and lay across square.
- Lay across the edge of square.
- Once dry, flip over.
- Cut popsicle sticks, and glue onto square to create a roof.
- Allow to dry.
- Coat front of ornaments in colorful or black chalkboard paint.
- Allow to dry and paint a second layer, or follow paint brand instructions.
- Use a glue gun to stick ribbons to the back of the ornaments.
- Draw on ornaments with chalkboard paint pens. Erase and redraw as you please.
- Hang on a tree, doorknob, door, or wall.
Find all of Jasmin Fine's craft ideas and recipes at 1finecookie.com. On the site, check out the how-to video for DIY Ice Pop Ornaments!
|
P.O. Box 6645 87 18th Street Wheeling, WV 26003 |
Careers! |

Sitemap © Copyright 2024 Twin Pops by Budget Saver. All Rights Reserved. Website design by TSG.